
Graphics Design
22.The Steps to Master Design Thinking in Your Projects
The Steps to Master Design Thinking in Your Projects
Here’s an overview:
- Understanding the Basics of Design Thinking
- Applying the Design Thinking Process to Your Projects
- Utilizing Design Thinking Tools and Techniques
- Overcoming Challenges in Implementing Design Thinking
- Measuring the Success of Design Thinking in Your Projects
Understanding the Basics of Design Thinking-The steps to master design thinking in your projects

Empathize:
The steps to master design thinking in your projects at the initial stage in design thinking, it is necessary I develop a mindset of the user. The obtainment of this goal consists of the activities such as observing, engaging and empathizing the people whom you design for.
- Define:
Subsequently, I specify the challenge from the admirer’s angle. It is the prime responsibility to draw an exact picture of the problem which has been resolved due to the understanding gained by empathy.
III. Ideate:
The steps to master design thinking in your projects brainstorming, then, is about not only creating a lot of the possible ideas but also thinking of the creative and problematic ones. At this phase I find myself approaching the problem from a different perspective than I normally would. Consequently, I come up with unique solutions to the problem set.
- Prototype:
I am developing a tentative plan/ mock up for the solutions that have been selected in brainstorming phase. Prototyping allows to visualize the original ideas and also gives feedback on the work being done for the improvement.
- Test:
Presenting the primary version of the algorithm to customers to get their input completes the process of testing. Then I can look to see if the puzzle is done properly and if there is need for some modifications.
The steps to master design thinking in your projects these foundational design thinking concepts will allow me to involve the user in the design process, which will ultimately help me combine these concepts and apply this thinking in a creative and innovative way.
Applying the Design Thinking Process to Your Projects
The steps to master design thinking in your projects from my perspective, the introduction of the design thinking methodology into your work may be the solution that will help you to achieve your goals faster and better. Here’s how you can incorporate this approach into your work:Here’s how you can incorporate this approach into your work:
Empathize with Your Users: The first thing that I do for a new project is to wear the shoes of the end users. I let myself think that I am one of them. When I am able to appreciate their needs, wishes, and hinders, I can customize my solutions taking into account the essential necessities.
Define the Problem: The steps to master design thinking in your projects after this the process of the main design question comes with which I clearly learn about whom I am designing for. At this stage, it is all about the minute and thorough analysis of those underlying issues that will bring me to the right solution. It is a critical step.
Ideate Creative Solutions: With the well-posed problem at the tip, I enter the brainstorming phase. In this space, my imagination is able to roam, unloading an abundance of ideas and solutions coming from everywhere without being judged. The act of brainstorming tends to bring forth many very creative ideas which then become better by time.
Prototype and Test: The steps to master design thinking in your projects once I get the ideas, then I undertake the work of developing prototypes to have a sight of the camera examples. After making these prototypes, I test their suitability by soliciting feedback (with users). The process of iteration, the discovery of problems and opportunities, the modification of my designs based on the feedback from the real world is what helps me strengthen my designs.
Iterate and Improve: The aim of Design thinking is to repeat the process again and again. As feedback enables me to perceive the situation objectively, I learn from my mistakes, and gain experience to improve my solutions based on the evidence. I can achieve this by going through a debugging process with the goal reached that the last design is both user-oriented and effective.
The steps to master design thinking in your projects in doing this way and putting myself in design thinker patterns I have discovered that my projects become more effective, creative and influential.
Utilizing Design Thinking Tools and Techniques

Initially, I carry out the projects, but they develop into remarkable ones by using design thinking tools and procedures. Here are some steps I take to master design thinking effectively:Here are some steps I take to master design thinking effectively:
Empathy Mapping: The steps to master design thinking in your projects first of the plan is to develop the empathy maps – an instrument that enables to reveal the emotions of the consumers. The use of this media helps me understand what is important for the end users and what drives them as stakeholders. Through assuming the position of those people we are going to be able to choose a more suitable target for the project.
Persona Development: Creating personas is a tool I can use to build the detailed character guides of the various user types involved in the project. Through elaboration on what they entail, the desired goal, and the experience, I can be sure that the outcome will correctly meet their needs.
Brainstorming Sessions: The steps to master design thinking in your projects in teams, I develop brainstorming sessions that invite team members to get involved in creative thinking and to dialectize wide range of ideas. This is just one way in which collaborative work helps to enhance creativity, and it is this way that typically the results of the combined actions of many people are often much more effective and unique than what an individual could come up with by his or herself.
Prototyping: Making fashion items into models gives me the ability to visualize new concepts and get feedback in the first step of design process. Prototyping could be low fidelity sketches or interactive models that make sure that my process is quick and I am able to implement different options, which brings me to the final product.
User Testing: The steps to master design thinking in your projects concentrating on the usability testing will help me to check the design issues and get rid of an issue that will influence the use of my application in the future if it is left alone. Through this trial and error I get direct valuable feedback from consumers thus making amendments that add to the positive experience of use.
Iteration: Iterative design thinking, in which I review and modify my concepts after feed-back and testing results have allowed me to have a continuous improvement. With the adoption of a strategy based on flexibility I will be able to respond to different circumstances and also reach my final objective.
The steps to master design thinking in your projects through combining the design thinking tools and methods into my workflow I may view the projects from the user perspective and may develop the practical and ingenious products that would generate the rich user experience.
Overcoming Challenges in Implementing Design Thinking

I have encountered several challenges when implementing design thinking in projects, but I have learned valuable strategies to overcome them effectively:I have encountered several challenges when implementing design thinking in projects, but I have learned valuable strategies to overcome them effectively:
Lack of Understanding: The steps to master design thinking in your projects in another case, teammates may still be confused with the idea of design thinking at first. To work round this, I therefore organize workshops and training sessions to make the participants learn about design thinking.
Resistance to Change: The steps to master design thinking in your projects incorporation of a totally different idea like Design thinking may not be favored at a conceptual level by the teammates who prefer traditional methods. To tackle this I make the team understand that the design thinking approach to the project is a better one and they should be actively engaged right from the start.
Time Constraints: The steps to master design thinking in your projects tight design schedule can make us to only partly feel the design thinking’s power. In order to overcome that, I focus on the most significant sections of design thinking and turn on the pace, which fits in the project.
Limited Resources: The steps to master design thinking in your projects besides personnel, tools and the budget, a major hindrance in incorporating design thinking can be attributed. I apply the solution to this problem by selecting the cheap but effective ways of distributing, using available material substitutes and the alliance with the other teams or departments.
Lack of Stakeholder Buy-In: The steps to master design thinking in your projects in order to create an effective design thinking, the focus on critical stakeholders as well as the support is crucial. I take responsibility in strategizing about building relationships, I exhibit the results through demonstrating design thinking, and I facilitate the stakeholders’ involvement so that they can buy into the design process.
The steps to master design thinking in your projects through actively dealing with these potential challenges I am experiencing an efficient and fruitful cycle in my practice while integrating the benefits of design thinking: such as innovation, user-centric solutions and successful project outcomes too.
Measuring the Success of Design Thinking in Your Projects

The steps to master design thinking in your projects therefore, stand on the position that it is very important to assess the performance of design thinking in order to gain ground in its application and show how effective this method is in practice. Here are some key ways to assess the effectiveness of design thinking in your projects:Here are some key ways to assess the effectiveness of design thinking in your projects:
User Feedback: The steps to master design thinking in your projects among the many measurements of success, we can not forget to listen to the users and in the end the user’s feedback is very important. This can be an effectiveness level achieved following the completion of surveys, interviews or usability test. Give qualified feedback for the requirements of user satisfaction and ease of use, for instance, the impact of design thinking on the end-user experience.
Iteration and Adaptation: Have your team members add in how your team has improved on the first concepts. The capacity to learn and get better as you take corrective measures on feedback, therefore, is a sign that you are good in design thinking. Consider how the final solution was arrived at, through the making of many revisions and improvement of the initial plan.
Impact on Key Metrics: The steps to master design thinking in your projects take into account the unique case of how design thinking changed the quality metrics of your important project. This may include factors as the ones shown above like user engagement or retention or increased conversion rates. By way of the heavy monitoring of these metrics both before and after it has been applied, you may go on to measuring the effect of Introductory Fashion on Project.
Collaboration and Team Dynamics: Assess the taking place in your team during the design thinking process. See the group members from the disciplines collaborated so well, how ideas were shared and enhanced along the way, and how there were solutions to conflict. Through cooperation as well as good teamwork proves that well installation design thinking is.
Reflection and Learning: One way to do this is by conducting a reflection within the team about the design thinking process and what worked well with it and what could be better. Learning from past design projects is very important in perfecting the method you use and in contributing to the sustaining of growth in the design thinking you use on other projects.
The steps to master design thinking in your projects doing it to the point, the mark of design thinking in your projects are the rates of users’s feedbacks, iterations, metrics’ changes, team collaboration, and reflection on outcomes. The implementation of the following analysis tools allows you to assess whether design thinking was successful for the project and make your next projects even more effective based on the gained insights.
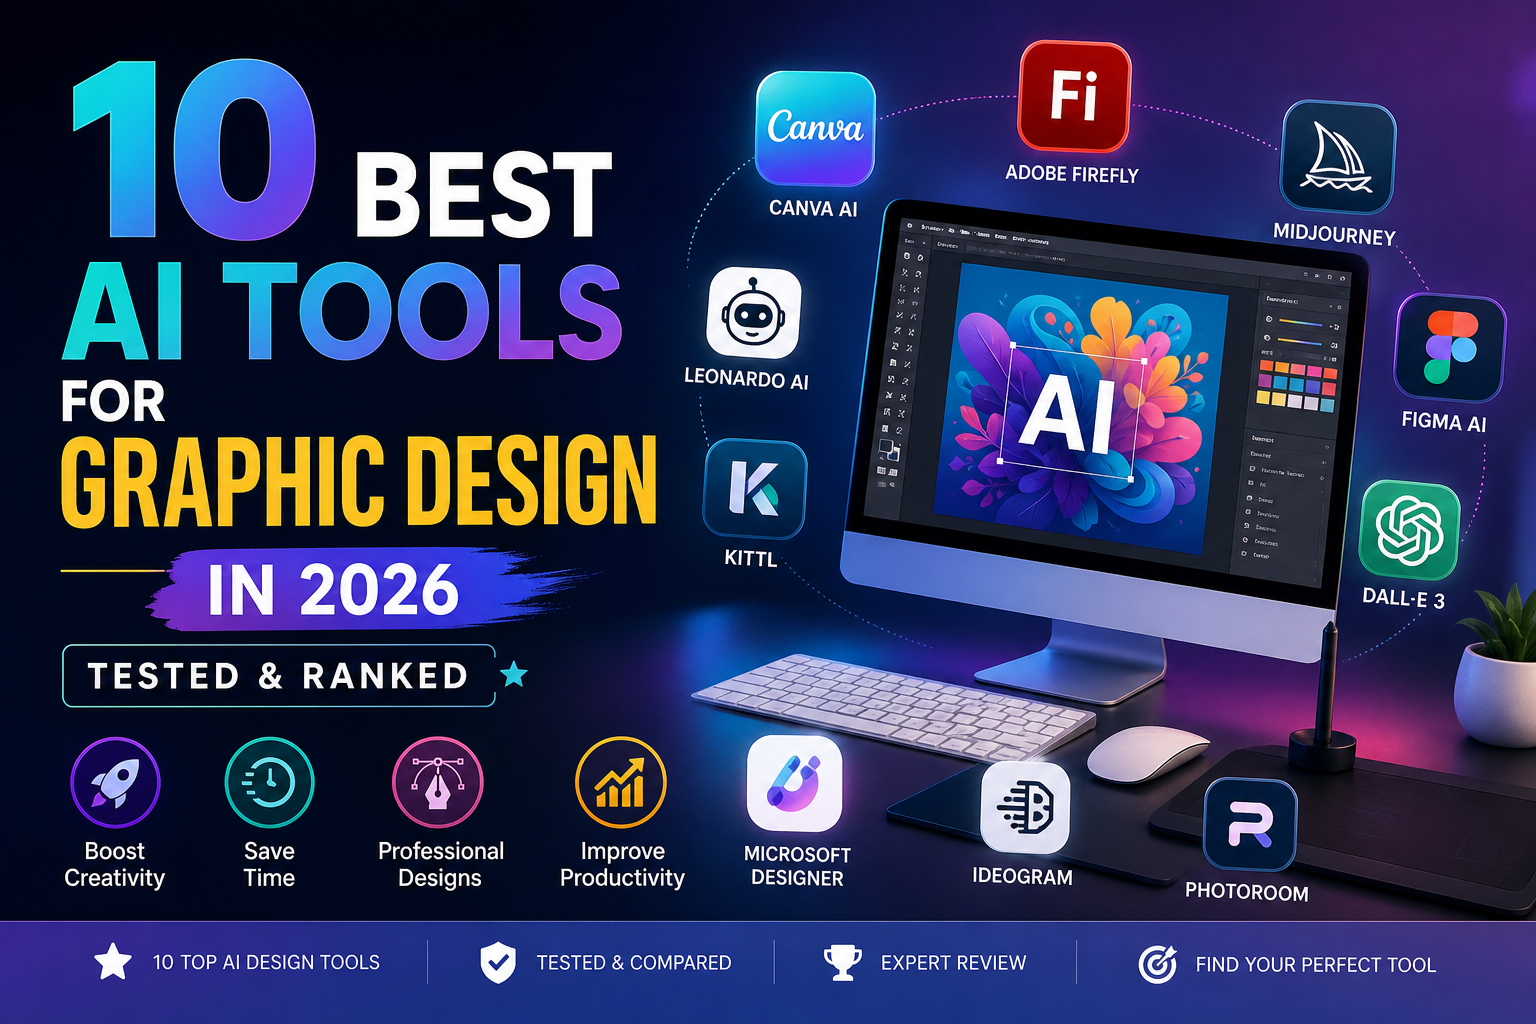
10 Best AI Tools for Graphic Design in 2026 (Tested & Ranked)
Artificial Intelligence has completely transformed the design industry. In 2026, graphic designers are no longer spending hours manually creating visuals — instead, they are leveraging powerful AI tools to automate workflows, generate ideas, and produce high-quality designs in minutes. The rise of AI-powered design platforms has made it easier for beginners, freelancers, and professionals alike to create stunning visuals without extensive technical skills.
In this comprehensive guide, we will explore the 10 Best AI Tools for Graphic Design in 2026. These tools are tested, ranked, and analyzed based on performance, features, ease of use, pricing, and real-world usability. Whether you are a beginner or an expert designer, this article will help you choose the best tool for your workflow.
Why 10 Best AI Tools for Graphic Design Are Essential for Designers in 2026
The demand for faster content creation has pushed designers toward AI-powered solutions. Today, AI tools can generate images, create layouts, remove backgrounds, and even design entire branding kits automatically.
According to recent industry insights, AI tools significantly reduce repetitive tasks such as resizing, editing, and generating design variations, allowing designers to focus more on creativity and strategy. (ToolChase)
This is why the 10 Best AI Tools for Graphic Design are becoming essential for anyone working in digital design, marketing, or content creation.
1. Canva AI (Magic Studio) — Best All-in-One Tool
Canva AI remains one of the 10 Best AI Tools for Graphic Design because of its simplicity and powerful features. It is perfect for beginners and professionals who want quick results.
Canva’s Magic Studio allows users to generate designs from text prompts, remove backgrounds, and even animate graphics instantly. With millions of templates and assets, it’s ideal for social media graphics, presentations, and branding. (tasarim.ai)
Key Features:
- Magic Design (AI-generated layouts)
- Text-to-image generator
- Background remover
- Drag-and-drop editor
Best For: Beginners and marketers
2. Adobe Firefly — Best for Professionals
Adobe Firefly is one of the most powerful tools in the 10 Best AI Tools for Graphic Design list, especially for professionals already using Adobe Creative Cloud.
It integrates seamlessly with Photoshop and Illustrator, offering generative fill, text-to-image, and advanced editing features. It is also trained on licensed data, making it safer for commercial use. (BuildPilot)
Key Features:
- Generative fill
- Style transfer
- Commercial-safe outputs
- Deep Adobe integration
Best For: Professional designers
3. Midjourney — Best for Creative Concepts
Midjourney is widely considered one of the 10 Best AI Tools for Graphic Design for generating high-quality artistic visuals.
Designers use it for mood boards, concept art, and creative exploration. Its ability to produce visually stunning images makes it a favorite among artists. (AI Tools Capital)
Key Features:
- High-quality image generation
- Style consistency
- Artistic rendering
Best For: Concept designers
4. Figma AI — Best for UI/UX Designers
Figma AI is a must-have in the 10 Best AI Tools for Graphic Design list for UI/UX professionals.
It helps designers generate layouts, automate design systems, and collaborate in real-time. It also integrates with plugins for enhanced productivity. (ToolChase)
Key Features:
- AI layout generation
- Real-time collaboration
- Design automation
Best For: UI/UX design
5. DALL·E 3 — Best for Beginners
DALL·E 3 is one of the easiest tools in the 10 Best AI Tools for Graphic Design category.
It allows users to generate images using simple text prompts, making it perfect for beginners who want quick results without technical knowledge. (AI Profit Labs)
Key Features:
- Text-to-image generation
- Easy prompt-based editing
- High-quality outputs
Best For: Beginners
6. Leonardo AI — Best Budget Option
Leonardo AI is among the 10 Best AI Tools for Graphic Design for those looking for affordability and flexibility.
It offers a free plan with daily credits and supports multiple design styles, including gaming assets and illustrations. (designshifu.com)
Key Features:
- Free plan available
- Multiple art styles
- Fast rendering
Best For: Budget users
7. Microsoft Designer — Best Free Tool
Microsoft Designer is a strong competitor in the 10 Best AI Tools for Graphic Design category, offering free AI-powered design features.
It allows users to create social media graphics, presentations, and marketing materials quickly using AI suggestions. (tasarim.ai)
Key Features:
- Free AI design tools
- Quick templates
- Easy interface
Best For: Free users
8. Kittl — Best for Typography Design
Kittl is one of the 10 Best AI Tools for Graphic Design known for its typography and logo design capabilities.
It provides advanced text editing tools and AI-powered design suggestions for branding projects.
Key Features:
- Typography tools
- Logo creation
- Vector editing
Best For: Branding designers
9. Ideogram — Best for Text-Based Designs
Ideogram stands out in the 10 Best AI Tools for Graphic Design for its ability to generate images with accurate text.
This makes it ideal for posters, ads, and social media content.
Key Features:
- Accurate text rendering
- AI-generated posters
- Creative layouts
Best For: Text-heavy designs
10. PhotoRoom — Best for Product Design
PhotoRoom completes the 10 Best AI Tools for Graphic Design list with its powerful product image editing features.
It is widely used for eCommerce and marketing visuals.
Key Features:
- Background removal
- Product mockups
- Batch editing
Best For: eCommerce
Comparison Table: 10 Best AI Tools for Graphic Design
| Tool | Best For | Pricing | Skill Level |
|---|---|---|---|
| Canva AI | All-in-one | Freemium | Beginner |
| Adobe Firefly | Professionals | Paid | Advanced |
| Midjourney | Concept art | Paid | Intermediate |
| Figma AI | UI/UX | Freemium | Advanced |
| DALL·E 3 | Beginners | Freemium | Beginner |
| Leonardo AI | Budget | Freemium | Intermediate |
| Microsoft Designer | Free tools | Free | Beginner |
| Kittl | Typography | Paid | Intermediate |
| Ideogram | Text design | Freemium | Intermediate |
| PhotoRoom | Product design | Freemium | Beginner |
How to Choose the Right AI Tool
When selecting from the 10 Best AI Tools for Graphic Design, consider these factors:
- Purpose: Social media, branding, UI/UX, or product design
- Skill level: Beginner vs professional
- Budget: Free vs paid tools
- Features: Automation, templates, integrations
Future of AI in Graphic Design
The future of design is heavily influenced by AI. Tools are becoming smarter, faster, and more intuitive. New advancements are focusing on automation, collaboration, and real-time editing.
However, AI is not replacing designers — it is enhancing their capabilities and allowing them to work more efficiently. (ToolChase)
Final Verdict
The 10 Best AI Tools for Graphic Design in 2026 offer something for everyone — from beginners to professionals. Tools like Canva AI and Adobe Firefly dominate the market, while Midjourney and Leonardo AI provide creative flexibility.
If you are just starting, go with Canva or DALL·E 3.
If you are a professional, Adobe Firefly and Figma AI are your best options.
Conclusion
The rise of AI has made graphic design more accessible than ever before. By using the 10 Best AI Tools for Graphic Design, you can create high-quality visuals, save time, and boost productivity.
Whether you are a freelancer, business owner, or content creator, these tools will help you stay ahead in 2026 and beyond.
Color Theory for Designers – A Beginner’s Guide to Smart Color Choices
Color plays a powerful role in graphic design. Whether you’re creating a logo, website, social media post, or t-shirt design, understanding color theory for designers helps you make smart, strategic decisions.
Color influences mood, brand perception, and even buying behavior. If you want your designs to look professional and communicate clearly, mastering color theory is essential.
In this beginner’s guide, you’ll learn the basics of the color wheel, color harmony, emotional color meanings, and the best tools to create stunning color palettes.
Why Color Theory Is Essential in Design
Color theory is the foundation of visual communication. It helps designers:
- Create visually balanced compositions
- Build strong brand identities
- Trigger emotional responses
- Improve readability and accessibility
- Increase conversions and engagement
For example, brands like use red to create excitement and energy, while uses blue to build trust and reliability.
When you understand color psychology and harmony, you design with intention—not guesswork.
The Color Wheel Basics
The color wheel is a circular diagram that organizes colors based on their relationships.
It was first developed by in the 17th century. The modern color wheel helps designers understand how colors interact with each other.
There are three main categories on the color wheel:
- Warm colors (Red, Orange, Yellow)
- Cool colors (Blue, Green, Purple)
- Neutral colors (Black, White, Gray, Brown)
Warm colors feel energetic and bold. Cool colors feel calm and professional.
Understanding the color wheel is the first step to mastering color harmony.
Primary, Secondary, and Tertiary Colors
1. Primary Colors
Primary colors cannot be created by mixing other colors.
- Red
- Blue
- Yellow
These are the base of all other colors.
2. Secondary Colors
Secondary colors are made by mixing two primary colors.
- Red + Blue = Purple
- Blue + Yellow = Green
- Red + Yellow = Orange
3. Tertiary Colors
Tertiary colors are created by mixing a primary and a secondary color.
Examples:
- Red-Orange
- Yellow-Green
- Blue-Purple
Using primary, secondary, and tertiary colors correctly helps create balanced and attractive designs.
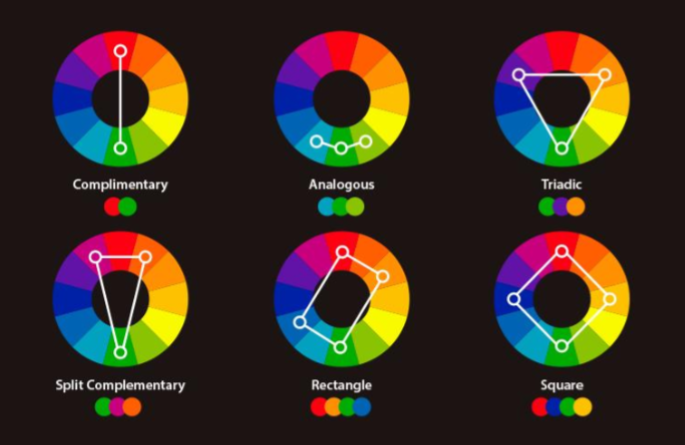
Color Harmony: Complementary, Triadic, and Analogous
Color harmony refers to combinations of colors that look pleasing together.
1. Complementary Colors
These are colors opposite each other on the color wheel.
Examples:
- Blue & Orange
- Red & Green
- Yellow & Purple
Complementary colors create high contrast and bold designs. Great for call-to-action buttons.
2. Triadic Colors
Triadic color schemes use three evenly spaced colors on the wheel.
Example:
- Red, Blue, Yellow
This combination creates vibrant and balanced designs.
3. Analogous Colors
Analogous colors sit next to each other on the color wheel.
Examples:
- Blue, Blue-Green, Green
- Red, Red-Orange, Orange
These create soft, harmonious, and natural-looking designs.
Choosing the right color harmony makes your design look professional and intentional.
Emotional Meaning of Colors
Color psychology plays a huge role in branding and marketing.
Here’s what common colors represent:
- Red – Energy, passion, urgency
- Blue – Trust, calm, professionalism
- Yellow – Happiness, optimism
- Green – Growth, health, nature
- Purple – Luxury, creativity
- Black – Power, elegance
- White – Simplicity, cleanliness
For example, luxury brands often use black and gold for a premium look. Eco-friendly brands prefer green to reflect sustainability.
Understanding emotional meaning helps designers choose colors that match the brand message.
Best Color Tools for Designers
Choosing the right colors becomes easier with professional tools.
1.
Coolors is a fast and easy color palette generator. You can lock colors and generate variations instantly.
2.
Adobe Color allows you to create palettes using color harmony rules like complementary, triadic, and analogous.
It also integrates smoothly with Adobe software like and .
These tools help you experiment and create professional color schemes quickly.
FAQ: What Are the Best Color Combinations?
There is no single “best” color combination. It depends on:
- Your target audience
- Brand personality
- Industry
- Cultural context
However, some popular combinations include:
- Blue & White (Clean and professional)
- Black & Gold (Luxury and premium)
- Purple & Yellow (Creative and bold)
- Green & Beige (Natural and organic)
The best approach is to test and refine your palette based on real design projects.
FAQ: Does Color Affect Conversions?
Yes, color significantly affects conversions.
Studies show that color can influence purchasing decisions and brand recognition. For example:
- Red creates urgency in sales banners
- Green encourages action (often used for CTA buttons)
- Blue builds trust on websites
Choosing the right call-to-action color can increase click-through rates and sales.
Conclusion: Practice Using Real Projects
Understanding color theory for designers is not just about learning rules—it’s about applying them.
Start practicing by:
- Redesigning a logo with different color harmonies
- Creating 3 social media posts using complementary colors
- Testing CTA button colors on your website
The more you experiment, the stronger your color instincts will become.
Smart color choices transform ordinary designs into powerful visual experiences.
Now it’s your turn—start creating with confidence! 🎨
Graphics Design
12 Expert Tips for Color Theory for Designers – A Beginner’s Guide to Smart Color Choices
12 Expert Tips for Color Theory for Designers – A Beginner’s Guide to Smart Color Choices
Introduction: Why Color Theory Matters in Design
Color theory for designers is one of the most powerful tools a designer has. Before you even read a word of text, color communicates mood, directs the viewer’s eye, and sets expectations. That’s exactly why understanding Color Theory for Designers – A Beginner’s Guide to Smart Color Choices is essential for anyone working in branding, web design, advertising, illustration, or UI/UX.
Color influences everything—attention, emotion, readability, and even conversion rates. When designers understand how colors relate, how they harmonize, and how they affect human psychology, their designs instantly become more polished, professional, and strategic.
Color theory for designers isn’t just artistic intuition; it’s a structured system of rules that designers rely on to make deliberate choices. Instead of guessing which colors “look good,” you’ll understand why they work. And once you master the basics, you can confidently create palettes that feel balanced, meaningful, and visually appealing.
Understanding the Color Wheel

The color theory for designers wheel is the foundation of color theory. It visually organizes colors in a circle, making it easy to understand how they relate and contrast.
Hue, Tone, Shade, and Tint
To use colors effectively, you need to understand these essential terms:
- Hue: The base color itself—red, blue, green, etc.
- Tone: Hue mixed with gray, resulting in softer, muted colors.
- Shade: Hue mixed with black, creating deeper, richer colors.
- Tint: Hue mixed with white, producing light, pastel versions.
These components help designers adjust mood and clarity. Soft tints feel gentle and friendly, whereas dark shades feel dramatic and bold.
Warm vs. Cool Colors

Warm colors—red, orange, yellow—bring energy and excitement. They draw attention quickly.
Cool colors—blue, green, purple—create calmness, trust, and relaxation.
Using warm and cool colors together can create visual balance, especially in user interfaces and branding.
Primary, Secondary, and Tertiary Colors

These groups form the backbone of the entire color wheel.
Primary Colors
- Red
- Blue
- Yellow
They cannot be created from other colors.
Secondary Colors
These are created by mixing two primary colors:
- Red + Blue = Purple
- Red + Yellow = Orange
- Blue + Yellow = Green
Tertiary Colors
Tertiary colors are formed when you mix a primary color with a secondary color. Examples include:
- Blue-green
- Yellow-orange
- Red-violet
Using These Groups in Branding
Primary color theory for designers often serve as core brand colors because they feel strong and memorable. Secondary and tertiary colors support the palette, adding dimension and flexibility for UI elements, icons, and backgrounds.
Color Harmony Fundamentals
Color harmony is about using colors in combinations that look pleasing and balanced.
Complementary Schemes
Complementary colors sit directly opposite each other on the color wheel. Examples include:
- Blue & Orange
- Red & Green
- Yellow & Purple
These pairs create high contrast, which is perfect for call-to-action buttons, posters, or impactful visual elements.
Triadic Palettes
A triadic palette forms a triangle on the color wheel—for example:
- Blue, Red, Yellow
- Purple, Orange, Green
Triadic schemes offer bold contrast while maintaining harmony.
Analogous Harmony
Analogous colors sit beside each other on the color wheel:
- Blue, Blue-Green, Green
- Red, Orange, Yellow
Analogous schemes feel calm and unified—great for backgrounds, illustrations, and user-friendly interfaces.
Psychological and Emotional Impact of Color

Color theory for designers influences human emotion across all forms of design.
Common Emotional Meanings
- Red: energy, urgency, passion
- Blue: trust, professionalism, reliability
- Yellow: optimism, creativity, cheerfulness
- Green: growth, calmness, environment
- Purple: luxury, imagination, spirituality
- Black: sophistication, strength, elegance
- White: simplicity, clarity, cleanliness
Understanding these meanings helps designers craft purposeful visual messages.
Cultural Interpretations
Color theory for designers don’t carry the same meaning in every culture.
For example:
- In the West, white symbolizes purity. In parts of Asia, it represents mourning.
- In China, red is a color of good fortune and celebration.
- In the U.S., blue often represents trust or corporate professionalism.
A designer must always consider cultural context when creating global products or branding.
Best Tools for Creating Color Palettes

Technology makes color exploration easier than ever.
Coolors
Color theory for designers is a fast, beginner-friendly palette generator. With just a click, you can lock colors, tweak brightness, and explore harmonious combinations.
Adobe Color
Adobe Color is designed for professionals. It offers:
- A digital color wheel
- Harmony suggestions
- Accessibility contrast checking
- Compatibility with Adobe Creative Cloud
This tool is perfect for branding, UI design, and large-scale visual projects.
Practical Tips for Designers to Choose Better Colors
- Start With One Base Color
Choose one color that represents the project’s mood. Build the palette around it using harmony rules.
- Consider Accessibility
Not all users see color the same way. Use contrast tools to ensure readability for people with low vision or color blindness.
- Limit Your Palette
Too many colors can overwhelm the viewer. Most branding systems use 3–5 main colors.
- Use Neutrals to Balance Your Palette
Whites, blacks, grays, and beiges provide breathing room around strong colors.
- Match Colors to Brand Personality
- Tech brands use blues for trust
- Eco brands lean toward greens
- Luxury brands prefer black, gold, or purple
FAQs
- What are the best color combinations?
Complementary and triadic combinations create the strongest visual impact, while analogous combinations create a pleasing, natural flow.
- Does color affect conversions?
Absolutely. High-contrast colors—especially for buttons—can dramatically improve user engagement and sales.
- Which tools help beginners learn Color theory for designers?
Coolors, Adobe Color, Paletton, and Canva’s palette generator are great.
- How can I pick colors for branding?
Focus on brand personality, target audience emotion, and industry standards. Start with a strong primary color.
- Are there colors designers should avoid?
Avoid extremely saturated combinations unless used sparingly for accents.
- How do I test color accessibility?
Tools like WebAIM and Adobe Color’s contrast checker help ensure your palette meets WCAG guidelines.
Conclusion: Practice Through Real-World Projects
Color theory for designers becomes easier the more you practice. Whether you redesign a homepage, create a logo, or experiment with advertisement layouts, real projects help you develop an intuitive understanding of color. The goal isn’t perfection—it’s learning to make intentional, smart choices that fit your message and audience.
The more you explore the color wheel, test harmony rules, and practice palette creation, the stronger your design skills will become.
-

 Graphics Design2 years ago
7.Exploring the Importance of Color Theory Charts
-

 Graphics Design10 months ago
Top 10 Best Graphic Design Tools for Beginners in 2025 (Free & Paid)
-

 Graphics Design2 years ago
10 Stunning Gradient Design Trends You Need to Know in 2024
-

 Graphics Design10 months ago
15 Freelance Graphic Design Tips to Boost Your Career in 2025
-

 Graphics Design2 years ago
29.Retro Design Is Making a Comeback in Modern Spaces
-

 Graphics Design1 year ago
Best Laptops for Graphic Designers – 2025 Buying Guide
-

 Graphics Design1 year ago
2025 Logo Design Trends: What’s In, What’s Out?
-

 Graphics Design2 years ago
15.The Importance of Effective Flyer Design in Marketing
binance register
October 2, 2024 at 10:49 am
Thanks for sharing. I read many of your blog posts, cool, your blog is very good.
Crear cuenta personal
November 26, 2024 at 11:59 am
Thanks for sharing. I read many of your blog posts, cool, your blog is very good.
b^onus de registro na binance
December 3, 2024 at 9:44 pm
I don’t think the title of your article matches the content lol. Just kidding, mainly because I had some doubts after reading the article.
gratis binance-konto
December 9, 2024 at 6:20 am
Your point of view caught my eye and was very interesting. Thanks. I have a question for you.
binance us register
December 22, 2024 at 10:26 pm
Can you be more specific about the content of your article? After reading it, I still have some doubts. Hope you can help me.