
Graphics Design
Master the Art of Grunge Texture: A Step-by-Step Guide for Designers
Master the Art of Grunge Texture: A Step-by-Step Guide for Designers
Grunge texture are rather grimy and rough, yet they still remain popular among designers who want to avoid hyper-cleaning up of design. This guide explains everything you should know to effectively apply grunge texture into your designs for character and depth.
What is a Grunge Texture?
Grunge texture is an element of design that imitates the rough and roughened, outside and inside appearances of actual objects. You know, paint which is peeled off or a dull concrete or wooden surface which has gone through the vagaries of weather without flinching. Despite its origins in the Grunge movement of the 1990’s it has be continued to be a popular style in modern design. They are mostly applied in digital artwork, posters, branding, as well as in the webs.
This paper aims at answering the following questions: Why use Grunge Texture in design?
There’s so much more to grunge textures than meets the eye, they are texturized narratives that are not just visual, but emotional. By adding grunge texture, your designs can:
- Be genuine and have personality.
- Get out of a rigid design approach of polished look.
- Give the viewer something to look at that is different and that will stimulate their curiosity.
- They help evoke certain feeling such the nostalgia or rebelliousness.
Apparently, any text processed through these tools turned into grunge textures.

But know the prerequisites first so that you’re ready with the right toolkit before moving on to methods. Here’s what you’ll need:
- Graphic Software: that you’ve used Photoshop, Illustrator or GIMP.
- Texture Resources: Access to high-quality textures can be done through the internet or capture through a camera.
- Brush Sets: Added more grunge brushes for an extra special look.
- Layer Effects: Overlay and mask images so that the textures merge well together.
Step 1: Grunge texture is a popular modern trend, and it means that one has to make a smart choice in order to select the right option.
It’s therefore important for the success of your design the texture you touch on. Decide the impression that you would like to make. For example:
- Subtle Effects: Choose light groups of scratches or material threads for plain designs, if you prefer a simple design.
- Bold Statements: Choose peeling paint or a cracked surface for that dramatic effect whenever necessary.
Free grunge textures can also be obtained from other web resources such as Unsplash, Envato or Shutterstock but remember that premium ones can also be found there.
Step 2: Preparing Your Canvas
Start with a clear canvas. Whether designing a poster, logo, or website, follow these steps:
- Specify the right dimensions for your project.
- Select the color scheme that would reflect grunge, for instance, shades of gray or bright contrasting colors.
- Open the grunge texture of your choice and copy it then paste it into the canvas.
Step 3: Applying Grunge Texture
This is where the stalwart actuates itself or where the cast produces the magnum opus. Follow these techniques to apply textures effectively:
Overlay Method
- Insert your texture in another layer in the design file of your choice.
- Scale and place the texture on the portion of the interface that you wish.
- Blending mode of the layer should be set to “Overlay” or ” Soft light.” Sound: In case sound appears to be too high or too low, use the corresponding control to adjust to your preference to the desired level.
Clipping Masks
- When creating your texture, you can always limit it to different parts of your artwork by using a clipping mask.
- This is especially applicable if typography, or logos have to be worked on.
Blending and Layering
- Overlapping multiple grunge textures is useful when you want to add depth into your design.
- Try using for instance Multiply or Hard Light blend modes to add changes to your sprites.
Step 4: Customizing Grunge Effects
These designs depict personal grunge texture features. Here’s how to create your own:
- Photograph Natural Textures: Photograph walls, asphalt or rusty metals.
- Scan Physical Media: Make ink splatters with the help of a spilt glass of water or crunched up paper.
- Brush Techniques: Spray custom grunge brushes to directly at the design.
Step 5: Fine-Tuning the Design
Once your texture is applied, refine the details to make the design cohesive:
- Adjust Levels: Find and understand how to use brightness and contrast adjustments in order to make textures stand out.
- Use Masks: Draw into the texture to remove some portions for almost every blend in look.
- Experiment: Experiment with the kind of touch and its location until something feels good.
Grunge Texture in Typography

Despite the fact that grunge textures are more frequently applied to typography kits than illustrations, typography is an important subject for grunge textures. If you want to work on punk rock poster or you are creating a vintage logo, the grunge texturing to the typography will do wonders for you.• Apply masks to the text layers efficienlty.• To other distressed fonts which gives the design a more grunge look.• Layer in elements: don’t confine yourself to using a single type of texture.igns feature personalized grunge textures. Here’s how to create your own:
- Photograph Natural Textures: Take photos of walls, asphalt, or rusted metal.
- Scan Physical Media: Use ink splatters or crumpled paper.
- Brush Techniques: Use custom grunge brushes to paint directly on your design.
How to Use Grunge Texture in Web Design

To banish the gray of winter, add warm colors: reds, pinks and oranges to the grunge textures that aren’t just for print. They also provide improvements to digital projects such as web design. There is an ability in using background textures or hallow buttons to give the website realistic feel or interactiveness respectively.
Avoid heavily detailed textures since they take time to load on the web. Grunge effects should be created using CSS or SVG since the latter provides scalability.• Use Gradation to mean that the use of multiple textures should be done in a streamlined manner so that it does not become a shock to the users.vent slow load times.
- Use CSS or SVG for creating scalable grunge effects.
- Blend textures subtly to avoid overwhelming the user experience.
Color and Grunge Texture: Finding Balance
Color can make or break a grunge design. Follow these principles:
- Stick to desaturated hues for authenticity.
- Introduce pops of vibrant colors for contrast.
- Use monochromatic schemes for timeless designs.
Common Mistakes to Avoid
While grunge texture designs are versatile, common pitfalls can derail your efforts:
- Overloading with textures, making the design too chaotic.
- Ignoring readability in typography-heavy designs.
- Using low-resolution textures that appear pixelated.
Grunge Texture in Branding

With grunge textures it is possible to redefine the brand image. They are more engaging, distinctive and familiar, especially for such segments as music, fashion or craft breweries.• Choose textures which are consistent with brand concepts.• Best for corporate or simple logo designs.• Get risky for rebellious or artistic kind of brands.res for web use to prevent slow load times.
- Use CSS or SVG for creating scalable grunge effects.
- Blend textures subtly to avoid overwhelming the user experience.
Grunge Texture Design Concerns
Some grunge texture still goes on today as it mixes with other textures and stays popular. Current trends include:
- Neon Grunge: Mixing elements in the use of neons with textures with a distressed touch.
- Minimalist Grunge: The creative application of textures into clean designs.
Abstract Grunge: According to them, it is carried out in four distinctive approaches: Incorporating surreal or dreamlike textures.• Go to streets painting photos with graffiti, rust, and crackles.• Learn about art periods as well as Dadaism aand abstract expressionism periods.• Search through the sites like Behance or Dribbble to have a list of designers to choose from.es to evolve, blending with other styles to remain relevant. Current trends include:
- Neon Grunge: Combining neon elements with distressed textures.
- Minimalist Grunge: Using textures subtly in clean designs.
- Abstract Grunge: Incorporating surreal or dreamlike textures.
Grunge Texture: Where to Find Inspiration

Creative inspiration is everywhere:
- Visit urban areas to photograph graffiti, rust, and cracks.
- Explore art movements like Dadaism and abstract expressionism.
- Look through online portfolios on Behance or Dribbble.
Demonstrating You Can Create a Successful Grunge Texture
Having developed your design, spread it over the globe. Post your art in social networks such as Instagram or in the DeviantArt community, or look for clients who are looking for specific styles.
FAQs
They might wonder what they actually need a grunge texture for, so they will make sure what it exist for.
Distressing is usually incorporated in the grunge texture to give an added more raw feel to the design. They are found mostly in the posters, branding, digital art and even in web designs if it requires an emotional appeal and differentiation.
How can I make my own grunge texture?
What has been said, grunge textures can be made by photographing wall or rust, or scanning hand made media such as splatters or by using graphic design by painting with grunge brushes.
Is there any free stuff available for grunge textures?
Yes, indeed, there are: Unsplash – Pexels – Brusheezy All of these platforms provide free high-quality textures. In case of commercial use of these ideas, make sure you uphold the licensing terms appropriately.
Which blending mode is perfect to apply the grunge textures?
Erasing modes such as overlay, multiply, and soft light are most appropriate most of the time. Try it yourself and discover what goes well with your design.
Can grunge textures remain relevant for modern branding why or why not?
Absolutely. Despite in the realm of clean and minimalistic aesthetics grunge textures can complement modern logos and brands when incorporated professionally primarily in musical, fashion and artistic craft niches.
Grunge texture, discussed above, may be asking here: Is it plausibly suitable for minimalist designs?
Yes, minimalist grunge is trendy. Interiors can be detailed and still not overwhelm minimalist cases, in fact, they should add to the whole effect.
Suggested Inbound and Outbound Links
Inbound Links:
- “Beginner’s Guide to Graphic Design Techniques”
- “10 Creative Ways to Enhance Typography”
Outbound Links:
Elevate your creative projects by mastering grunge texture techniques. With this step-by-step guide, you’ll transform your designs into dynamic, expressive works of art.
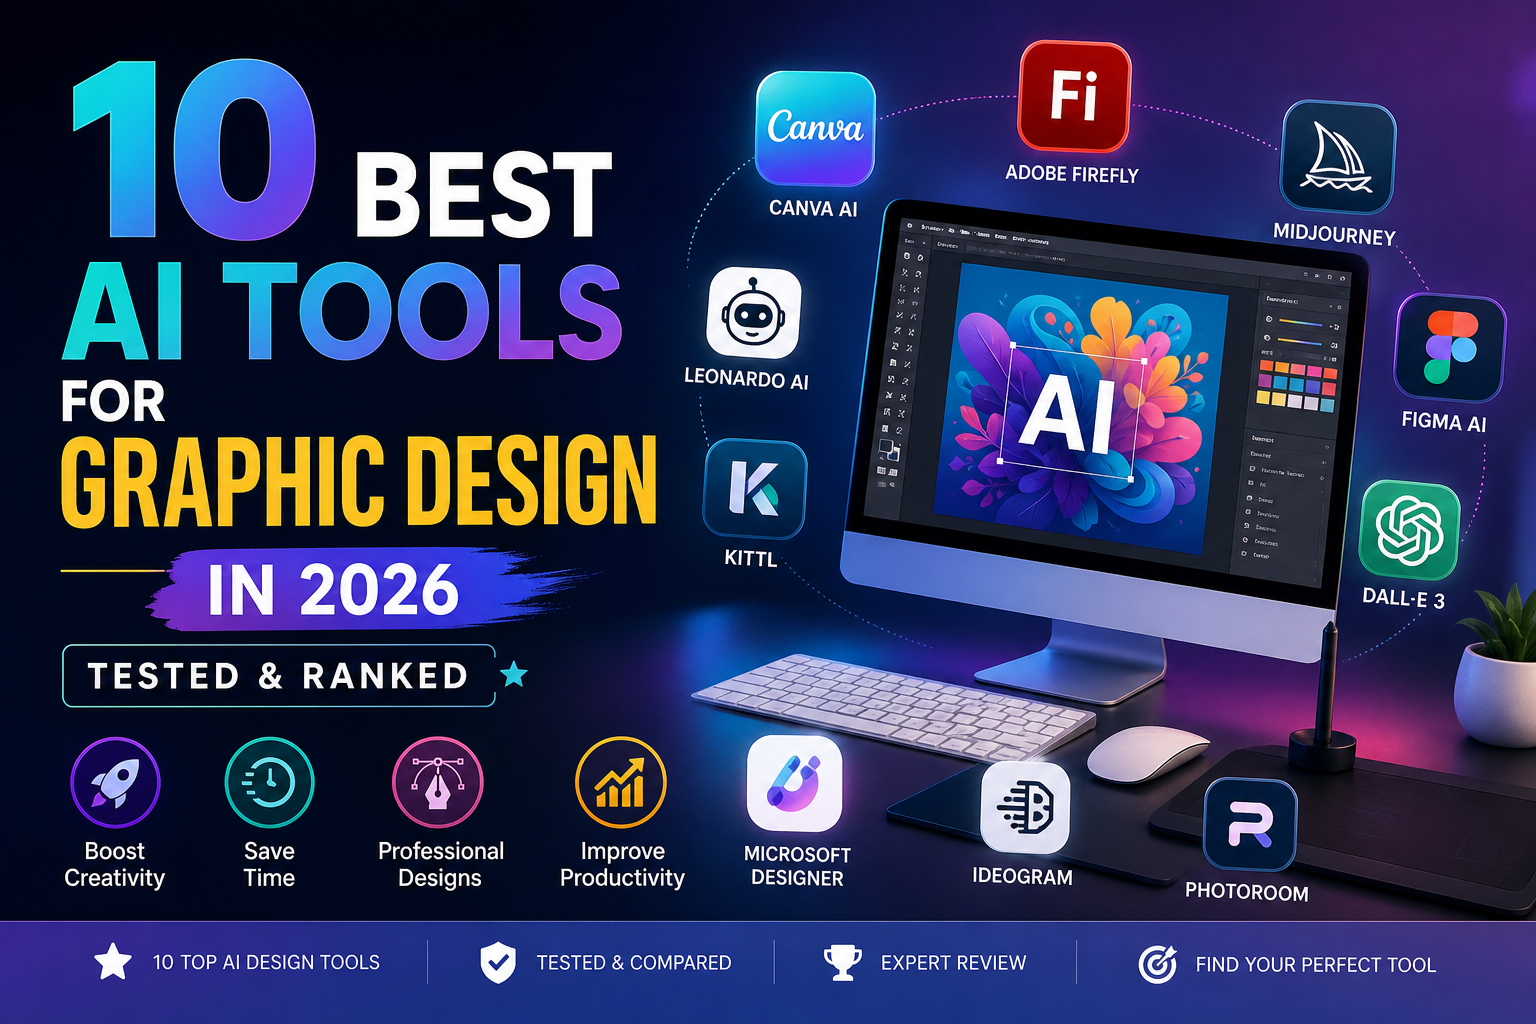
10 Best AI Tools for Graphic Design in 2026 (Tested & Ranked)
Artificial Intelligence has completely transformed the design industry. In 2026, graphic designers are no longer spending hours manually creating visuals — instead, they are leveraging powerful AI tools to automate workflows, generate ideas, and produce high-quality designs in minutes. The rise of AI-powered design platforms has made it easier for beginners, freelancers, and professionals alike to create stunning visuals without extensive technical skills.
In this comprehensive guide, we will explore the 10 Best AI Tools for Graphic Design in 2026. These tools are tested, ranked, and analyzed based on performance, features, ease of use, pricing, and real-world usability. Whether you are a beginner or an expert designer, this article will help you choose the best tool for your workflow.
Why 10 Best AI Tools for Graphic Design Are Essential for Designers in 2026
The demand for faster content creation has pushed designers toward AI-powered solutions. Today, AI tools can generate images, create layouts, remove backgrounds, and even design entire branding kits automatically.
According to recent industry insights, AI tools significantly reduce repetitive tasks such as resizing, editing, and generating design variations, allowing designers to focus more on creativity and strategy. (ToolChase)
This is why the 10 Best AI Tools for Graphic Design are becoming essential for anyone working in digital design, marketing, or content creation.
1. Canva AI (Magic Studio) — Best All-in-One Tool
Canva AI remains one of the 10 Best AI Tools for Graphic Design because of its simplicity and powerful features. It is perfect for beginners and professionals who want quick results.
Canva’s Magic Studio allows users to generate designs from text prompts, remove backgrounds, and even animate graphics instantly. With millions of templates and assets, it’s ideal for social media graphics, presentations, and branding. (tasarim.ai)
Key Features:
- Magic Design (AI-generated layouts)
- Text-to-image generator
- Background remover
- Drag-and-drop editor
Best For: Beginners and marketers
2. Adobe Firefly — Best for Professionals
Adobe Firefly is one of the most powerful tools in the 10 Best AI Tools for Graphic Design list, especially for professionals already using Adobe Creative Cloud.
It integrates seamlessly with Photoshop and Illustrator, offering generative fill, text-to-image, and advanced editing features. It is also trained on licensed data, making it safer for commercial use. (BuildPilot)
Key Features:
- Generative fill
- Style transfer
- Commercial-safe outputs
- Deep Adobe integration
Best For: Professional designers
3. Midjourney — Best for Creative Concepts
Midjourney is widely considered one of the 10 Best AI Tools for Graphic Design for generating high-quality artistic visuals.
Designers use it for mood boards, concept art, and creative exploration. Its ability to produce visually stunning images makes it a favorite among artists. (AI Tools Capital)
Key Features:
- High-quality image generation
- Style consistency
- Artistic rendering
Best For: Concept designers
4. Figma AI — Best for UI/UX Designers
Figma AI is a must-have in the 10 Best AI Tools for Graphic Design list for UI/UX professionals.
It helps designers generate layouts, automate design systems, and collaborate in real-time. It also integrates with plugins for enhanced productivity. (ToolChase)
Key Features:
- AI layout generation
- Real-time collaboration
- Design automation
Best For: UI/UX design
5. DALL·E 3 — Best for Beginners
DALL·E 3 is one of the easiest tools in the 10 Best AI Tools for Graphic Design category.
It allows users to generate images using simple text prompts, making it perfect for beginners who want quick results without technical knowledge. (AI Profit Labs)
Key Features:
- Text-to-image generation
- Easy prompt-based editing
- High-quality outputs
Best For: Beginners
6. Leonardo AI — Best Budget Option
Leonardo AI is among the 10 Best AI Tools for Graphic Design for those looking for affordability and flexibility.
It offers a free plan with daily credits and supports multiple design styles, including gaming assets and illustrations. (designshifu.com)
Key Features:
- Free plan available
- Multiple art styles
- Fast rendering
Best For: Budget users
7. Microsoft Designer — Best Free Tool
Microsoft Designer is a strong competitor in the 10 Best AI Tools for Graphic Design category, offering free AI-powered design features.
It allows users to create social media graphics, presentations, and marketing materials quickly using AI suggestions. (tasarim.ai)
Key Features:
- Free AI design tools
- Quick templates
- Easy interface
Best For: Free users
8. Kittl — Best for Typography Design
Kittl is one of the 10 Best AI Tools for Graphic Design known for its typography and logo design capabilities.
It provides advanced text editing tools and AI-powered design suggestions for branding projects.
Key Features:
- Typography tools
- Logo creation
- Vector editing
Best For: Branding designers
9. Ideogram — Best for Text-Based Designs
Ideogram stands out in the 10 Best AI Tools for Graphic Design for its ability to generate images with accurate text.
This makes it ideal for posters, ads, and social media content.
Key Features:
- Accurate text rendering
- AI-generated posters
- Creative layouts
Best For: Text-heavy designs
10. PhotoRoom — Best for Product Design
PhotoRoom completes the 10 Best AI Tools for Graphic Design list with its powerful product image editing features.
It is widely used for eCommerce and marketing visuals.
Key Features:
- Background removal
- Product mockups
- Batch editing
Best For: eCommerce
Comparison Table: 10 Best AI Tools for Graphic Design
| Tool | Best For | Pricing | Skill Level |
|---|---|---|---|
| Canva AI | All-in-one | Freemium | Beginner |
| Adobe Firefly | Professionals | Paid | Advanced |
| Midjourney | Concept art | Paid | Intermediate |
| Figma AI | UI/UX | Freemium | Advanced |
| DALL·E 3 | Beginners | Freemium | Beginner |
| Leonardo AI | Budget | Freemium | Intermediate |
| Microsoft Designer | Free tools | Free | Beginner |
| Kittl | Typography | Paid | Intermediate |
| Ideogram | Text design | Freemium | Intermediate |
| PhotoRoom | Product design | Freemium | Beginner |
How to Choose the Right AI Tool
When selecting from the 10 Best AI Tools for Graphic Design, consider these factors:
- Purpose: Social media, branding, UI/UX, or product design
- Skill level: Beginner vs professional
- Budget: Free vs paid tools
- Features: Automation, templates, integrations
Future of AI in Graphic Design
The future of design is heavily influenced by AI. Tools are becoming smarter, faster, and more intuitive. New advancements are focusing on automation, collaboration, and real-time editing.
However, AI is not replacing designers — it is enhancing their capabilities and allowing them to work more efficiently. (ToolChase)
Final Verdict
The 10 Best AI Tools for Graphic Design in 2026 offer something for everyone — from beginners to professionals. Tools like Canva AI and Adobe Firefly dominate the market, while Midjourney and Leonardo AI provide creative flexibility.
If you are just starting, go with Canva or DALL·E 3.
If you are a professional, Adobe Firefly and Figma AI are your best options.
Conclusion
The rise of AI has made graphic design more accessible than ever before. By using the 10 Best AI Tools for Graphic Design, you can create high-quality visuals, save time, and boost productivity.
Whether you are a freelancer, business owner, or content creator, these tools will help you stay ahead in 2026 and beyond.
Color Theory for Designers – A Beginner’s Guide to Smart Color Choices
Color plays a powerful role in graphic design. Whether you’re creating a logo, website, social media post, or t-shirt design, understanding color theory for designers helps you make smart, strategic decisions.
Color influences mood, brand perception, and even buying behavior. If you want your designs to look professional and communicate clearly, mastering color theory is essential.
In this beginner’s guide, you’ll learn the basics of the color wheel, color harmony, emotional color meanings, and the best tools to create stunning color palettes.
Why Color Theory Is Essential in Design
Color theory is the foundation of visual communication. It helps designers:
- Create visually balanced compositions
- Build strong brand identities
- Trigger emotional responses
- Improve readability and accessibility
- Increase conversions and engagement
For example, brands like use red to create excitement and energy, while uses blue to build trust and reliability.
When you understand color psychology and harmony, you design with intention—not guesswork.
The Color Wheel Basics
The color wheel is a circular diagram that organizes colors based on their relationships.
It was first developed by in the 17th century. The modern color wheel helps designers understand how colors interact with each other.
There are three main categories on the color wheel:
- Warm colors (Red, Orange, Yellow)
- Cool colors (Blue, Green, Purple)
- Neutral colors (Black, White, Gray, Brown)
Warm colors feel energetic and bold. Cool colors feel calm and professional.
Understanding the color wheel is the first step to mastering color harmony.
Primary, Secondary, and Tertiary Colors
1. Primary Colors
Primary colors cannot be created by mixing other colors.
- Red
- Blue
- Yellow
These are the base of all other colors.
2. Secondary Colors
Secondary colors are made by mixing two primary colors.
- Red + Blue = Purple
- Blue + Yellow = Green
- Red + Yellow = Orange
3. Tertiary Colors
Tertiary colors are created by mixing a primary and a secondary color.
Examples:
- Red-Orange
- Yellow-Green
- Blue-Purple
Using primary, secondary, and tertiary colors correctly helps create balanced and attractive designs.
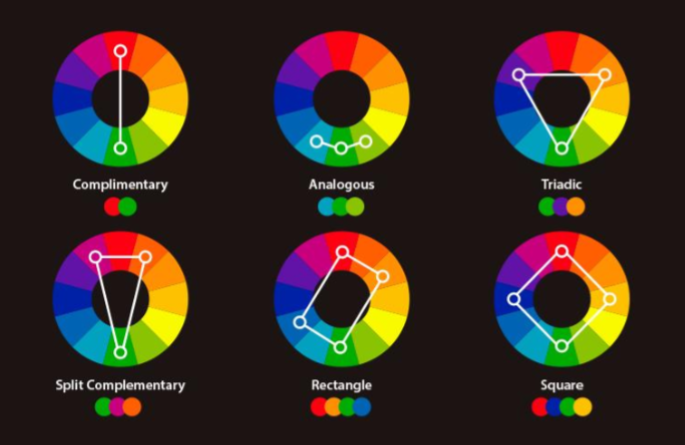
Color Harmony: Complementary, Triadic, and Analogous
Color harmony refers to combinations of colors that look pleasing together.
1. Complementary Colors
These are colors opposite each other on the color wheel.
Examples:
- Blue & Orange
- Red & Green
- Yellow & Purple
Complementary colors create high contrast and bold designs. Great for call-to-action buttons.
2. Triadic Colors
Triadic color schemes use three evenly spaced colors on the wheel.
Example:
- Red, Blue, Yellow
This combination creates vibrant and balanced designs.
3. Analogous Colors
Analogous colors sit next to each other on the color wheel.
Examples:
- Blue, Blue-Green, Green
- Red, Red-Orange, Orange
These create soft, harmonious, and natural-looking designs.
Choosing the right color harmony makes your design look professional and intentional.
Emotional Meaning of Colors
Color psychology plays a huge role in branding and marketing.
Here’s what common colors represent:
- Red – Energy, passion, urgency
- Blue – Trust, calm, professionalism
- Yellow – Happiness, optimism
- Green – Growth, health, nature
- Purple – Luxury, creativity
- Black – Power, elegance
- White – Simplicity, cleanliness
For example, luxury brands often use black and gold for a premium look. Eco-friendly brands prefer green to reflect sustainability.
Understanding emotional meaning helps designers choose colors that match the brand message.
Best Color Tools for Designers
Choosing the right colors becomes easier with professional tools.
1.
Coolors is a fast and easy color palette generator. You can lock colors and generate variations instantly.
2.
Adobe Color allows you to create palettes using color harmony rules like complementary, triadic, and analogous.
It also integrates smoothly with Adobe software like and .
These tools help you experiment and create professional color schemes quickly.
FAQ: What Are the Best Color Combinations?
There is no single “best” color combination. It depends on:
- Your target audience
- Brand personality
- Industry
- Cultural context
However, some popular combinations include:
- Blue & White (Clean and professional)
- Black & Gold (Luxury and premium)
- Purple & Yellow (Creative and bold)
- Green & Beige (Natural and organic)
The best approach is to test and refine your palette based on real design projects.
FAQ: Does Color Affect Conversions?
Yes, color significantly affects conversions.
Studies show that color can influence purchasing decisions and brand recognition. For example:
- Red creates urgency in sales banners
- Green encourages action (often used for CTA buttons)
- Blue builds trust on websites
Choosing the right call-to-action color can increase click-through rates and sales.
Conclusion: Practice Using Real Projects
Understanding color theory for designers is not just about learning rules—it’s about applying them.
Start practicing by:
- Redesigning a logo with different color harmonies
- Creating 3 social media posts using complementary colors
- Testing CTA button colors on your website
The more you experiment, the stronger your color instincts will become.
Smart color choices transform ordinary designs into powerful visual experiences.
Now it’s your turn—start creating with confidence! 🎨
Graphics Design
12 Expert Tips for Color Theory for Designers – A Beginner’s Guide to Smart Color Choices
12 Expert Tips for Color Theory for Designers – A Beginner’s Guide to Smart Color Choices
Introduction: Why Color Theory Matters in Design
Color theory for designers is one of the most powerful tools a designer has. Before you even read a word of text, color communicates mood, directs the viewer’s eye, and sets expectations. That’s exactly why understanding Color Theory for Designers – A Beginner’s Guide to Smart Color Choices is essential for anyone working in branding, web design, advertising, illustration, or UI/UX.
Color influences everything—attention, emotion, readability, and even conversion rates. When designers understand how colors relate, how they harmonize, and how they affect human psychology, their designs instantly become more polished, professional, and strategic.
Color theory for designers isn’t just artistic intuition; it’s a structured system of rules that designers rely on to make deliberate choices. Instead of guessing which colors “look good,” you’ll understand why they work. And once you master the basics, you can confidently create palettes that feel balanced, meaningful, and visually appealing.
Understanding the Color Wheel

The color theory for designers wheel is the foundation of color theory. It visually organizes colors in a circle, making it easy to understand how they relate and contrast.
Hue, Tone, Shade, and Tint
To use colors effectively, you need to understand these essential terms:
- Hue: The base color itself—red, blue, green, etc.
- Tone: Hue mixed with gray, resulting in softer, muted colors.
- Shade: Hue mixed with black, creating deeper, richer colors.
- Tint: Hue mixed with white, producing light, pastel versions.
These components help designers adjust mood and clarity. Soft tints feel gentle and friendly, whereas dark shades feel dramatic and bold.
Warm vs. Cool Colors

Warm colors—red, orange, yellow—bring energy and excitement. They draw attention quickly.
Cool colors—blue, green, purple—create calmness, trust, and relaxation.
Using warm and cool colors together can create visual balance, especially in user interfaces and branding.
Primary, Secondary, and Tertiary Colors

These groups form the backbone of the entire color wheel.
Primary Colors
- Red
- Blue
- Yellow
They cannot be created from other colors.
Secondary Colors
These are created by mixing two primary colors:
- Red + Blue = Purple
- Red + Yellow = Orange
- Blue + Yellow = Green
Tertiary Colors
Tertiary colors are formed when you mix a primary color with a secondary color. Examples include:
- Blue-green
- Yellow-orange
- Red-violet
Using These Groups in Branding
Primary color theory for designers often serve as core brand colors because they feel strong and memorable. Secondary and tertiary colors support the palette, adding dimension and flexibility for UI elements, icons, and backgrounds.
Color Harmony Fundamentals
Color harmony is about using colors in combinations that look pleasing and balanced.
Complementary Schemes
Complementary colors sit directly opposite each other on the color wheel. Examples include:
- Blue & Orange
- Red & Green
- Yellow & Purple
These pairs create high contrast, which is perfect for call-to-action buttons, posters, or impactful visual elements.
Triadic Palettes
A triadic palette forms a triangle on the color wheel—for example:
- Blue, Red, Yellow
- Purple, Orange, Green
Triadic schemes offer bold contrast while maintaining harmony.
Analogous Harmony
Analogous colors sit beside each other on the color wheel:
- Blue, Blue-Green, Green
- Red, Orange, Yellow
Analogous schemes feel calm and unified—great for backgrounds, illustrations, and user-friendly interfaces.
Psychological and Emotional Impact of Color

Color theory for designers influences human emotion across all forms of design.
Common Emotional Meanings
- Red: energy, urgency, passion
- Blue: trust, professionalism, reliability
- Yellow: optimism, creativity, cheerfulness
- Green: growth, calmness, environment
- Purple: luxury, imagination, spirituality
- Black: sophistication, strength, elegance
- White: simplicity, clarity, cleanliness
Understanding these meanings helps designers craft purposeful visual messages.
Cultural Interpretations
Color theory for designers don’t carry the same meaning in every culture.
For example:
- In the West, white symbolizes purity. In parts of Asia, it represents mourning.
- In China, red is a color of good fortune and celebration.
- In the U.S., blue often represents trust or corporate professionalism.
A designer must always consider cultural context when creating global products or branding.
Best Tools for Creating Color Palettes

Technology makes color exploration easier than ever.
Coolors
Color theory for designers is a fast, beginner-friendly palette generator. With just a click, you can lock colors, tweak brightness, and explore harmonious combinations.
Adobe Color
Adobe Color is designed for professionals. It offers:
- A digital color wheel
- Harmony suggestions
- Accessibility contrast checking
- Compatibility with Adobe Creative Cloud
This tool is perfect for branding, UI design, and large-scale visual projects.
Practical Tips for Designers to Choose Better Colors
- Start With One Base Color
Choose one color that represents the project’s mood. Build the palette around it using harmony rules.
- Consider Accessibility
Not all users see color the same way. Use contrast tools to ensure readability for people with low vision or color blindness.
- Limit Your Palette
Too many colors can overwhelm the viewer. Most branding systems use 3–5 main colors.
- Use Neutrals to Balance Your Palette
Whites, blacks, grays, and beiges provide breathing room around strong colors.
- Match Colors to Brand Personality
- Tech brands use blues for trust
- Eco brands lean toward greens
- Luxury brands prefer black, gold, or purple
FAQs
- What are the best color combinations?
Complementary and triadic combinations create the strongest visual impact, while analogous combinations create a pleasing, natural flow.
- Does color affect conversions?
Absolutely. High-contrast colors—especially for buttons—can dramatically improve user engagement and sales.
- Which tools help beginners learn Color theory for designers?
Coolors, Adobe Color, Paletton, and Canva’s palette generator are great.
- How can I pick colors for branding?
Focus on brand personality, target audience emotion, and industry standards. Start with a strong primary color.
- Are there colors designers should avoid?
Avoid extremely saturated combinations unless used sparingly for accents.
- How do I test color accessibility?
Tools like WebAIM and Adobe Color’s contrast checker help ensure your palette meets WCAG guidelines.
Conclusion: Practice Through Real-World Projects
Color theory for designers becomes easier the more you practice. Whether you redesign a homepage, create a logo, or experiment with advertisement layouts, real projects help you develop an intuitive understanding of color. The goal isn’t perfection—it’s learning to make intentional, smart choices that fit your message and audience.
The more you explore the color wheel, test harmony rules, and practice palette creation, the stronger your design skills will become.
-

 Graphics Design2 years ago
7.Exploring the Importance of Color Theory Charts
-

 Graphics Design12 months ago
Top 10 Best Graphic Design Tools for Beginners in 2025 (Free & Paid)
-

 Graphics Design2 years ago
10 Stunning Gradient Design Trends You Need to Know in 2024
-

 Graphics Design11 months ago
15 Freelance Graphic Design Tips to Boost Your Career in 2025
-

 Graphics Design2 years ago
29.Retro Design Is Making a Comeback in Modern Spaces
-

 Graphics Design1 year ago
Best Laptops for Graphic Designers – 2025 Buying Guide
-

 Graphics Design1 year ago
2025 Logo Design Trends: What’s In, What’s Out?
-

 Graphics Design2 years ago
15.The Importance of Effective Flyer Design in Marketing